Setting Up Datasource Adapters
AMI ships with several inbuilt datasource adapters for common data types, such as MS Excel, MySQL, etc. For a full list of supported softwares that AMI supports natively, see here.
Note
Not all adapters are available by default in AMI. If you require a specific datasource adapter that we support, please contact us at support@3forge.com to receive the .jar files. Otherwise, follow this guide on creating a custom datasource adapter.
Overview
AMI datasource adapters provide a GUI interface in the Web for attaching external databases to your layouts. Datasources can be added and accessed via the Data Modeler in the AMI dashboard.
For datasource adapters that aren't shipped by default with AMI, you will need to get them assigned to you via the 3forge client portal. These will be in the "files" section of the portal as zips containing .jar files.
To add a new datasource adapter, you will need to follow the steps outlined below.
Setup
The general setup for adding new datasource adapters to your AMI is as follows:
- Download the zip of the adapter from the client portal.
- Extract from the zip any
.jarfiles you need for the adapter. - Add those files to your AMI library.
- Configure your AMI properties to include the adapter.
Adding a Plugin
-
From the client portal, download and extract all the
.jarfiles provided for your adapter. -
Navigate to the library directory of your AMI installation (
amione/libby default) and place the.jarfiles there. This will enable the plugin's methods in AMI. -
Add the plugin to the list of existing plugins in your
local.propertiesconfiguration file.
Properties
You will need to configure your local.properties file. If you do not have one already, navigate to the amione/config directory of your AMI installation and create one.
Add the following line referencing the datasource adapter (this will be different for each adapter):
1 2 3 | |
For a custom datasource adapter, you will need to add instead the fully qualified class names of each Java class.
Note
$${ami.datasource.plugins} references the existing plugin list. Do not remove it, and ensure that any additional plugins are added after in a comma-delimited list with no spaces.
Upon restarting AMI, you will now see the new datasource option in the GUI.
Datasource Options
Datasources can be added via the GUI, but they can also be added programmatically via the AMIDB shell tool.
This is useful in cases where users want to supply parameters after launch, for example: supplying a password option in a datamodel.
Setup (AMIDB)
Adding datasources programmatically and passing additional parameters post-launch requires the following:
- The Center procedure
__ADD_DATASOURCE(the full documentation can be found here), enabling thepermittedOverridesoption. -
The following
use ds_options which can be called within fields that receive AmiScript:ds_urlds_usernameds_passwordds_password_encds_optionsds_relayds_adapter
These correspond to the
permittedOverridesparameter.
Note
For a full description of each option and how it is used in a datamodel, see the table in this access clause documentation.
Example (AMIDB)
This example will guide you how to add a MySQL database via the AMIDB shell tool and pass the password as an additional parameter after launch.
Note
The example uses placeholders, it will not work if used directly. Please use your own password-hosted datasources in place.
-
- Launch and log into AMI as normal. Open the AMIDB shell tool and input the following procedure:
Note the following parameters in the procedure:
- A
"username"with access to the database - An empty string
""for the password field - The
"PASSWORD"override allowing passwords to be supplied post-launch
-
Open the Data Modeler (Dashboard -> Data Modeler). The datasource "world" will now be visible:

Right-click on the datasource and select "Add Datamodel." You will see a pop-up saying the connection has failed. This will be due to the missing password.
Press the "Continue" button anyway and continue to the datamodel creation wizard.
-
In a datamodel, define a variable that will store the password object:
Then in the same window, create a table:
This will now return a table object populated with the SQL query.
Example (GUI)
This example will guide you how to add a MySQL database via the GUI and pass the password as an additional parameter after launch.
Note
The example uses placeholders, it will not work if used directly. Please use your own password-hosted datasources in place.
-
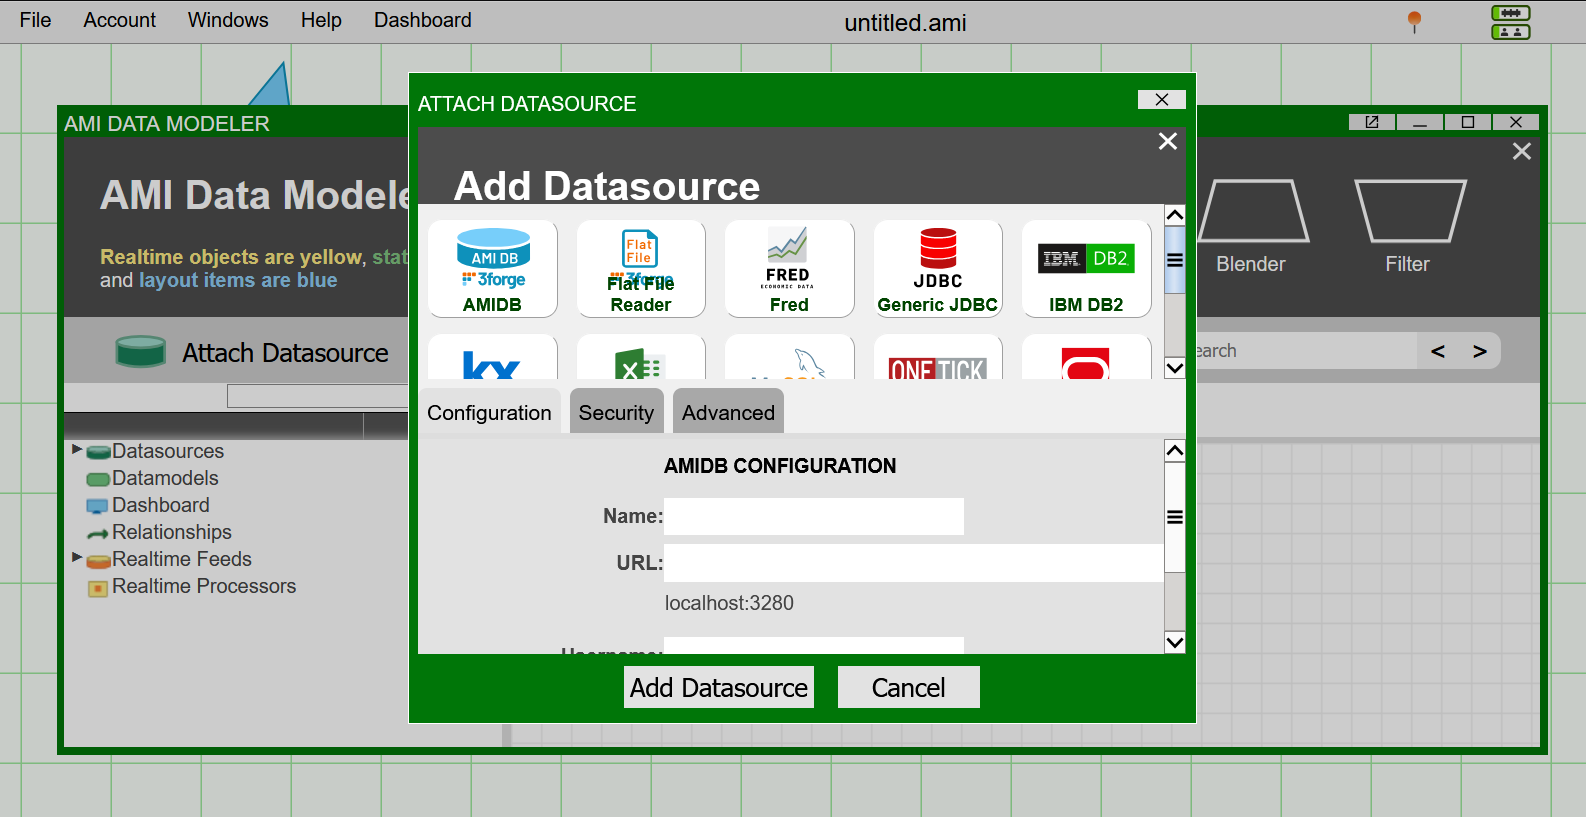
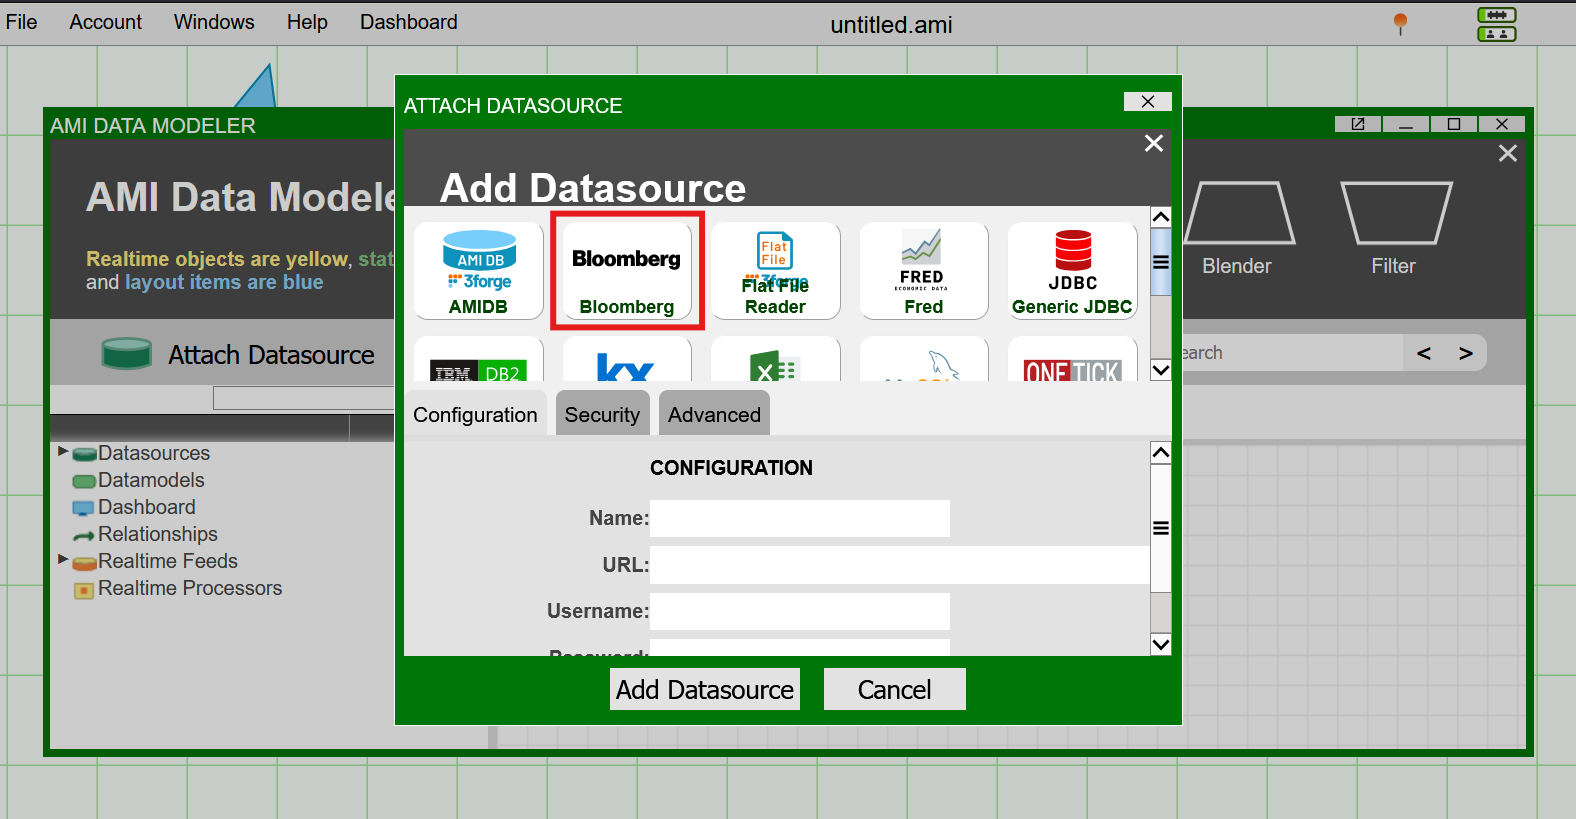
Launch and log into AMI as normal and go to add a datasource (Dashboard -> Data Modeler -> Attach Datasource).

-
Select "MySQL JDBC" from the adapter list and input the datasource details in the "Configuration" tab.

Omit the "Password Field" and select the "Skip Test and force Add" checkbox. This ensures that the datasource is added even though the configuration is technically invalid.
-
Navigate to the "Security" tab and select the "Password" checkbox. This will enable you to override the password once the datasource has been added.

-
Click "Add Datasource" and accept the warnings. Now in a datamodel, define a variable that will store the password object:
Then in the same window, create a table:
This will now return a table object populated with the SQL query.
Supported Adapters
Some popular common adapters that we provide include:
If you require documentation for specific datasource adapter plugins not on this list, please reach out to us.
Custom Datasource Adapters
We provide the Java interface for writing your own datasource adapters in the event that you have a datasource not currently supported.
The instructions can be found here. Alternatively, reach out to us at support@3forge.com.