Upgrading 3forge
The 3forge platform is constantly being developed and updated with new features, optimizations, and more. Users can request the latest or specific versions of AMI for their use-cases.
This page contains instructions for upgrading the platform and additional runtime options.
Overview
AMI Installation Files
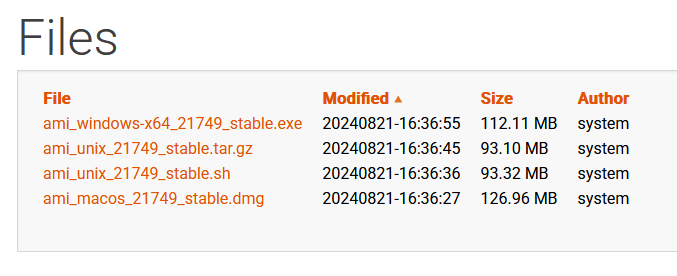
All 3forge-supplied files are assigned to users via the 3forge Client Portal under the "Files" section in the left-hand navigation.
AMI installation files will follow this naming convention: ami_<OS>_<VERSION_NUMBER>_<RELEASE_TYPE>.<ZIP_OR_EXECUTABLE>.
Generally, we assign versions as either:
- Compressed
.tar.gzfiles (Linux) - Executable
.sh(Linux) and.exe(Windows) files
Download the appropriate file(s) for your operating system. Upgrade instructions vary slightly for each file type and operating system, find the specific instructions for each below.
File Dependencies
The following directories will be overwritten on upgrade:
amione/libamione/dataamione/scripts
The following files will also be overwritten:
build.properties,defaults.properties,root.properties,speedlogger.properties(inamione/config)AMI_One.vmoptions,AMI_One_linux.vmoptions(inamione)
Note
If you have a modified start.sh or .vmoptions file, we recommend copying and saving the file(s) elsewhere to prevent them being overwritten.
Paste them back into the relevant directory after the upgrade.
Upgrade Instructions
Warning
Running an upgrade is not reversible and will overwrite your existing AMI installation's folder. We strongly recommend backing up your 3forge project before proceeding.
See our source control guide for best practices.
For Unix installations, 3forge files may be assigned to your account in .tar.gz format. To upgrade:
-
Download this file and navigate to the directory of the 3forge installation you wish to upgrade.

-
Extract the files into the directory hosting the AMI installation to overwrite it. Use the following command in terminal to do so:
Note
You can use the following command to preview the zip contents:
- Run the installer and select the option to update the existing installation.
- Run the installation wizard and update accordingly. Instructions are the same as first-time set up of AMI for Windows.
Plugins
New releases of 3forge may not be compatible with existing plugins and may cause issues on launch. We will assign up-to-date versions of 3forge plugins, like datasource adapters, with your 3forge files. If you are missing any, please reach out to us at support@3forge.com.
You may need to do the following:
- Add any new
.jarfiles to theamione/libdirectory and remove old ones - Reconfigure your
local.propertiesfile with updated plugin properties
For any custom user-written Java plugins:
- You may need to rebuild them to include the new
autocode.jarandout.jarfiles of the latest installation (inamione/lib) - Reconfigure your
local.propertiesfile if necessary - Export the new
.jarfiles to theamione/libdirectory and remove old ones
Backwards Compatibility
As 3forge gets updated, some features are either changed or upgraded. While we take care to ensure backwards compatibility where possible, some outdated features are deprecated.
Below are some features that have been changed and instructions on ensuring your current projects continue to work seamlessly:
USE ds Keyword
-
Previous versions of 3forge supported datamodels using the syntax:
USE ds=AMI.This has now been deprecated and the source must be wrapped in quotes:
USE ds="AMI".To ensure older managed schemas use the correct format, use the
tools.shtool supplied:- Navigate to the directory with your schema, this is typically
/amione/data. -
Input the following in commandline:
replacingmanaged_schemawith the schema files of your application.
This is equivalent to altering the
.amisqlfiles manually. - Navigate to the directory with your schema, this is typically
Advanced Java Configurations
Running 3forge on Java 18
By default, 3forge expects Java 1.7 or 1.8. While 3forge is configured to run for Java 18, you may encounter exceptions. In this case, you will need to change the start.sh script located in the root directory of your installation in amione/scripts.
You will need to add the following lines to your start.sh after the initial declaration of the JAVA_OPTIONS and CP variables.
Search for the following line (this should be around line 84 in the default start.sh script):
Then add these lines after:
Save, exit, and relaunch 3forge.
Using Java G1GC Garbage Collector
By default, 3forge uses the CMS Garbage Collector to minimize latency and pause times. For better scalability and efficient memory management, you can use G1GC instead. To change to G1GC, navigate to the root directory amione/scripts.
Open the start.sh script, then find and remove the following properties:
Then add this property: