Source & Version Control
This document contains recommended guidelines and best practices for setting up source control for different versions of 3forge, especially if using 3forge in client-facing applications.
Note
This document is intended as a guide only - your individual needs and implementations may differ, so please adjust accordingly.
Alternatively, please reach out to us at support@3forge.com for tailored advice and recommendations.
Overview
3forge layouts are modular by design, enabling easy access and development for multiple users on the same dashboard. We recommend for most enterprises that you have the following:
- A development environment (dev)
- A QA/UAT environment for testing user functionality, especially client-facing
- A production environment (prod)
It is typically best practice to have all of these environments, but depending on your use case, you may find dev and prod sufficient. We generally do not recommend having any less than both prod and dev to avoid potential dependency issues during upgrades, especially for live production settings.
Recommended Setup
We suggest a source control pipeline similar to this:
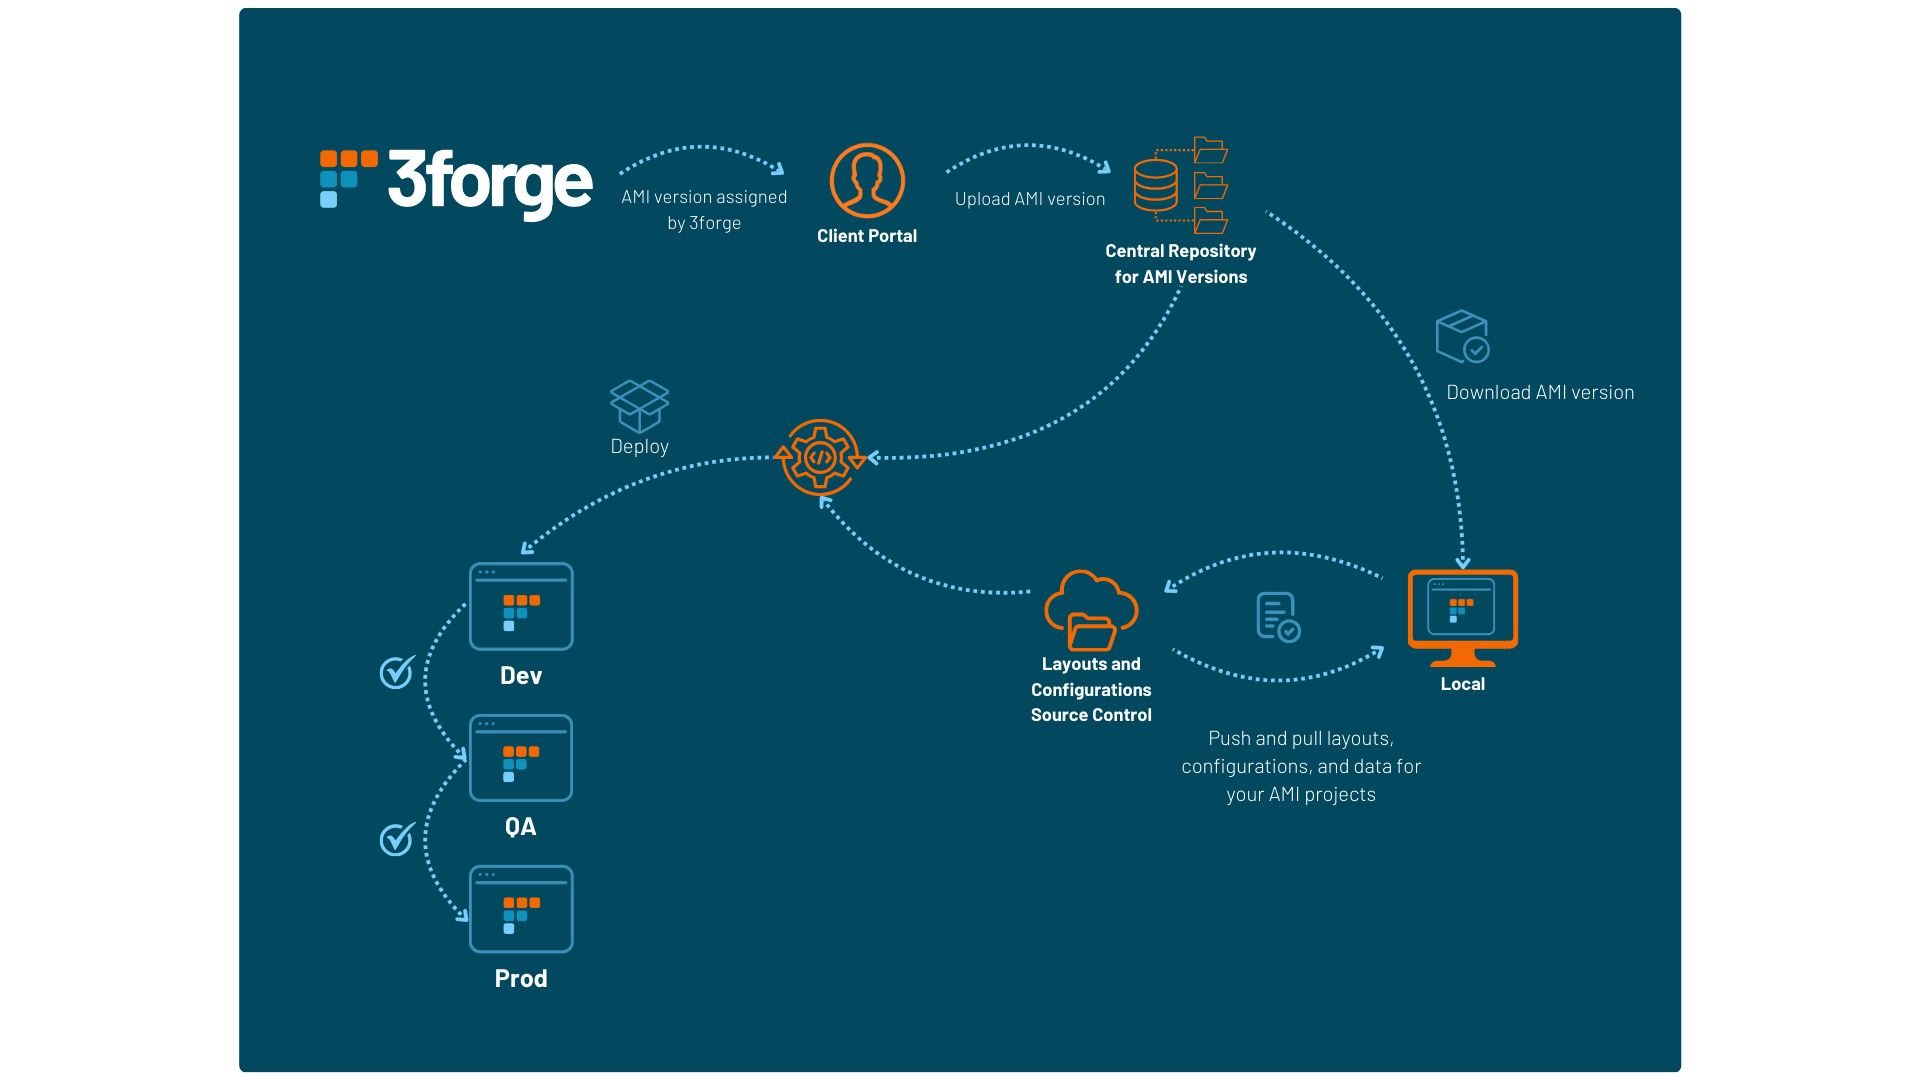
Key structural components include:
- A hosted or centralized repository with a backlog of 3forge versions your enterprise has used
- A separate repository for your users' 3forge layouts, components, and configuration files (see the configuration guide for more information)
- A locally built dashboard instance that is tested before being deployed (dev -> QA -> prod)
Important Files for Source Control
We suggest a source control file format similar to this:

Files that you should maintain in source control include but are not limited to:
-
Your layout files, stored in the
amione/datadirectory of an AMI installation. These files will either be:- local (
data/users) - cloud (
data/cloud) (recommended) - absolute (stored anywhere you specify on your device)
You will need to keep relative dependencies between parent/child layouts consistent (i.e cloud -> cloud, local -> local).
- local (
-
Data files like database schemas, datasource connections (.dat files in
amione/persist) - Configuration files for each environment (
local.propertiesinami/amione/config) - Any
.jarfiles for custom plugins - Any scripts stored in
amione/scriptsincludingstart.sh
Upgrading 3forge
3forge versions, upgrades, and plugins will be assigned to you by members of our team where they can be downloaded from the 3forge portal.
Follow the instructions below for installing different AMI versions.
Note
These are the same as the instructions for upgrading 3forge.
Download AMI Installation Files
- From the 3forge portal, navigate to "Files" and download the latest version of 3forge assigned to you.
- Upload and push this to your 3forge version control repository, e.g Github, Perforce, etc.
Upgrade 3forge (Local User)
-
Ensure your layout and datasource files are saved and pushed to your data repository.
Warning
If you do not do this, your data will be overwritten and lost.
-
Pull the relevant 3forge version from your 3forge source control repository.
- In the directory of the 3forge installation you wish to upgrade, run the installation wizard of the relevant 3forge version for your operating system.
-
This will overwrite and upgrade 3forge. The following directories will be overwritten:
amione/libamione/dataamione/scripts
The following files will also be overwritten:
build.properties,defaults.properties,root.properties,speedlogger.properties(inamione/config)AMI_One.vmoptions,AMI_One_linux.vmoptions(inamione)
Note
If you are using a modified
start.shor.vmoptionsfile, you will need to manage the file(s) in your source control and copy them back into the relevant AMI directory after upgrading.
Build and Deploy
-
Using your source control manager, pull and download all your layouts (data), datasources, plugins, and scripts.
Note
Remember to add all plugins referenced in your
local.propertiestoamione/lib, or AMI may fail to launch correctly.Additionally, you may need to rebuild any custom Java plugins to include the updated
autocode.jarandout.jarfiles. -
Run your build script. You can streamline the whole process by including the above steps in a
build.shfile. For help, please contact us at support@3forge.com.