First Time Setup
Creating an Account
-
Visit 3forge.com/signup to create an account if you do not already have one. Please use the email associated with your organization and not your personal email.
-
After you submit, 3forge will send you an email to activate your account.
-
Once you have activated your account, a team member will contact you via email to assign you a version and license.
Installing and Starting 3forge
- Go to 3forge.com/login and log in to your account.
-
Click on "Files" in the left-hand navigation and download the installation files for your operating system:
- For Unix:
ami_unix_<SOME_VERSION>_stable.tar.gz - For Windows:
ami_windows-x64_<SOME_VERSION>.exe
- For Unix:
Installation steps vary slightly depending on your OS.
-
3forge requires Java to run. Please ensure that you have Java 8 or higher installed onto your machine.
-
Download and extract the
.tar.gzfile to the target directory for the installation. Run the following command in terminal: -
To launch 3forge, navigate to the installation directory and run the
start.shscript inamione/scriptsfrom terminal:You should see something similar to the following output in your terminal:
Note
You may need to give your scripts executable permissions. If so, run the following in terminal:
-
Then, in your preferred browser, go to the specified 3forge address. By default, this is
http://localhost:33332/. -
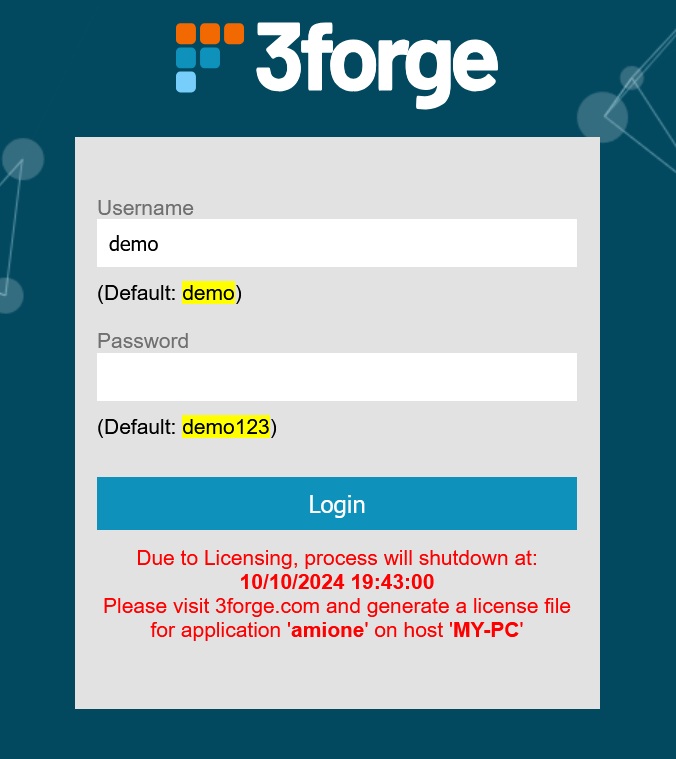
Log in to your 3forge dashboard with your application login details. By default, this is
demo|demo123.
-
Run the .exe file to start the installation wizard and follow the steps to install.
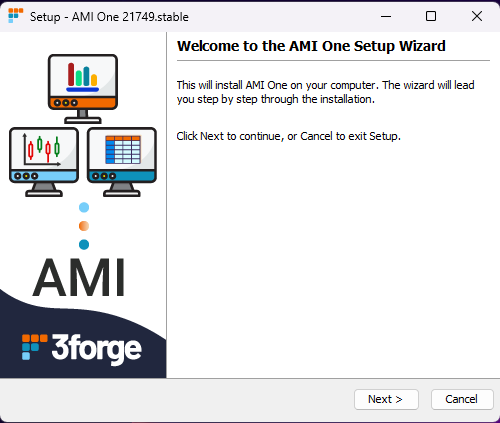
-
If you have an existing installation, your wizard will look slightly different. You can choose to install another 3forge instance elsewhere on your machine or update your existing installation.

-
From your Start Menu, search for "AMI One" to launch, or launch the
AMI_One.exeApplication directly from the directory inamione.This will launch your default browser with the 3forge login page. By default, this is hosted on
http://localhost:33332/ -
Log in to your 3forge dashboard with your application login details. By default, this is
demo|demo123.
Note
You may encounter a Windows Defender SmartScreen warning. If this happens, click on the "More info" pop-up, and select "Run anyway." For older versions of Windows (10 or earlier), right-click on the executable file and go to Properties->General and under the Security section, check "Unblock."
Different Java Versions
3forge should launch out the box with no additional steps, however if you update or change your Java version, 3forge may need additional configuration.
If you find that 3forge is hanging on launch and see the following message:
Then the VM is likely failing to build. You can verify this by checking the stderr.log file. This will be in the amione/log directory of your installation.
If you see an error message containing the following or similar:
Then 3forge is attempting to build the VM for an incorrect version of Java.
On startup, 3forge generates a .vmoptions file. For different versions of Java, these options are incompatible, typically between Java 8 and newer versions.
To fix this, you will need to regenerate the .vmoptions file. Do the following steps:
- Navigate to the
amionedirectory and delete the existingAMI_One_linux.vmoptionsfile. - Rerun the
start.shscript inamione/scripts. - 3forge should now launch.
If you have multiple Java versions configured on the machine running 3forge and wish to use a specific version, you will need to modify the start.sh script located in amione/scripts. Locate the following section of your start.sh file:
Replace java in the highlighted lines to the path of the Java version you wish to use, e.g: usr/lib/jvm/java-8-openjdk-amd64/jre/bin/java.
Save and then rerun your start.sh script to launch 3forge. If 3forge hangs, follow the steps for updating Java
Note
If the platform fails to start after these configuration steps, please see the Startup Failure troubleshooting page.
Creating a License
When starting 3forge for the first time, you will be prompted with the login page and a licensing warning. If no license is given, the software will automatically log you out and shut down after the specified time.
Take note of the application and host names in the warning (e.g, amione and MY-PC in the image below) as you will need them to generate licenses.
You can either generate licenses from the 3forge website (recommended), or within 3forge.
-
From your 3forge Portal, navigate to "Licenses" on the left hand side, or click this link. Scroll down to "Create a license":

-
Under "Application(s):", select the
amionecheckbox. -
Enter the hostname of the machine you are using in the "Host(s):" field -- this should match the host in the warning.
-
Click create. You will now see your license(s) at the top of the page. View and copy the contents into your clipboard.
-
Now, navigate to the installation directory of 3forge,
ami/amione, and create a new filef1license.txt. -
In a text editor of your choice, open this file and paste the license into this file. Save and exit.
-
Restart 3forge. You may need to shut down the process in your task manager.
-
Once logged into 3forge, set it the "Editor" mode (
Ctrl+d). -
In the top navigation bar, go to Help -> Enter/Update License.
-
You can either paste the license generated from the website, or you can click "Generate License Key."
-
If you clicked "Generate License Key," fill in the user details you use to log into your 3forge account.

-
Click "Request License Key", then copy and paste the license into the previous window.
-
Click on the submit button to finish the license creation process and restart 3forge.
Next Steps
After successfully setting up 3forge, we strongly suggest that you familiarize yourself with some of the platform's functions. Please see the introductory tutorials on the 3forge Portal. These should take approximately 15 - 25 minutes each and will introduce you to key concepts like creating your first layout.
We are frequently adding to and updating our Tutorials page, so please check back for more in-depth written and video tutorials in the future.
Alternatively, we welcome you to reach out to us at support@3forge.com for additional help and tutorial requests.
Minimum Environment
Minimum Operating Environment
| Component | Minimum Requirement |
|---|---|
| OPERATING SYSTEM | Ubuntu, Fedora/Red Hat, CentOS, Mac OS X, Windows Certified (Full support for Java 1.8 or later) |
| RAM | 4GB |
| DISK | 20GB |
| PROCESSOR | 2GHZ CPU (Intel & AMD Certified) |
| CLIENT BROWSER | Up-to-date version of: Microsoft Edge, Chrome, Firefox or Safari |
| ACCESS | Must have permissions to install software |
| NETWORK | Server must have access to data sources. Firewalls should also be enabled to allow connections to port 33332 |
Suggested Operating Environment
| Component | Suggested Requirement |
|---|---|
| OPERATING SYSTEM | Unix environment with Java 1.8 or later |
| RAM | 32GB or more |
| DISK | 100GB or more |
| PROCESSOR | 3GHZ CPU, 8 cores or more |
| CLIENT BROWSER | Up-to-date version of: Microsoft Edge, Chrome, Firefox or Safari |
| ACCESS | Must have permissions to install software (often requiring Admin rights on Windows) |
| NETWORK | Server must have access to data sources. Firewalls should also be enabled to allow connections to port 33332 |