Installing 3forge Enterprise
3forge Enterprise installs as a single directory tree and starts from a script on Linux or from the Windows installer. This page covers prerequisites, downloading the build, the directory layout, the configuration model, and upgrading an existing installation.
Prerequisites
- Java 8 or later on Linux, installed on the machine that runs AmiCore. The Windows installer includes its own Java runtime, so Windows needs no separate Java installation.
- Permission to install software on that machine.
- Network access from the machine to your data sources.
- A 3forge account with an Enterprise entitlement.
Download the Build
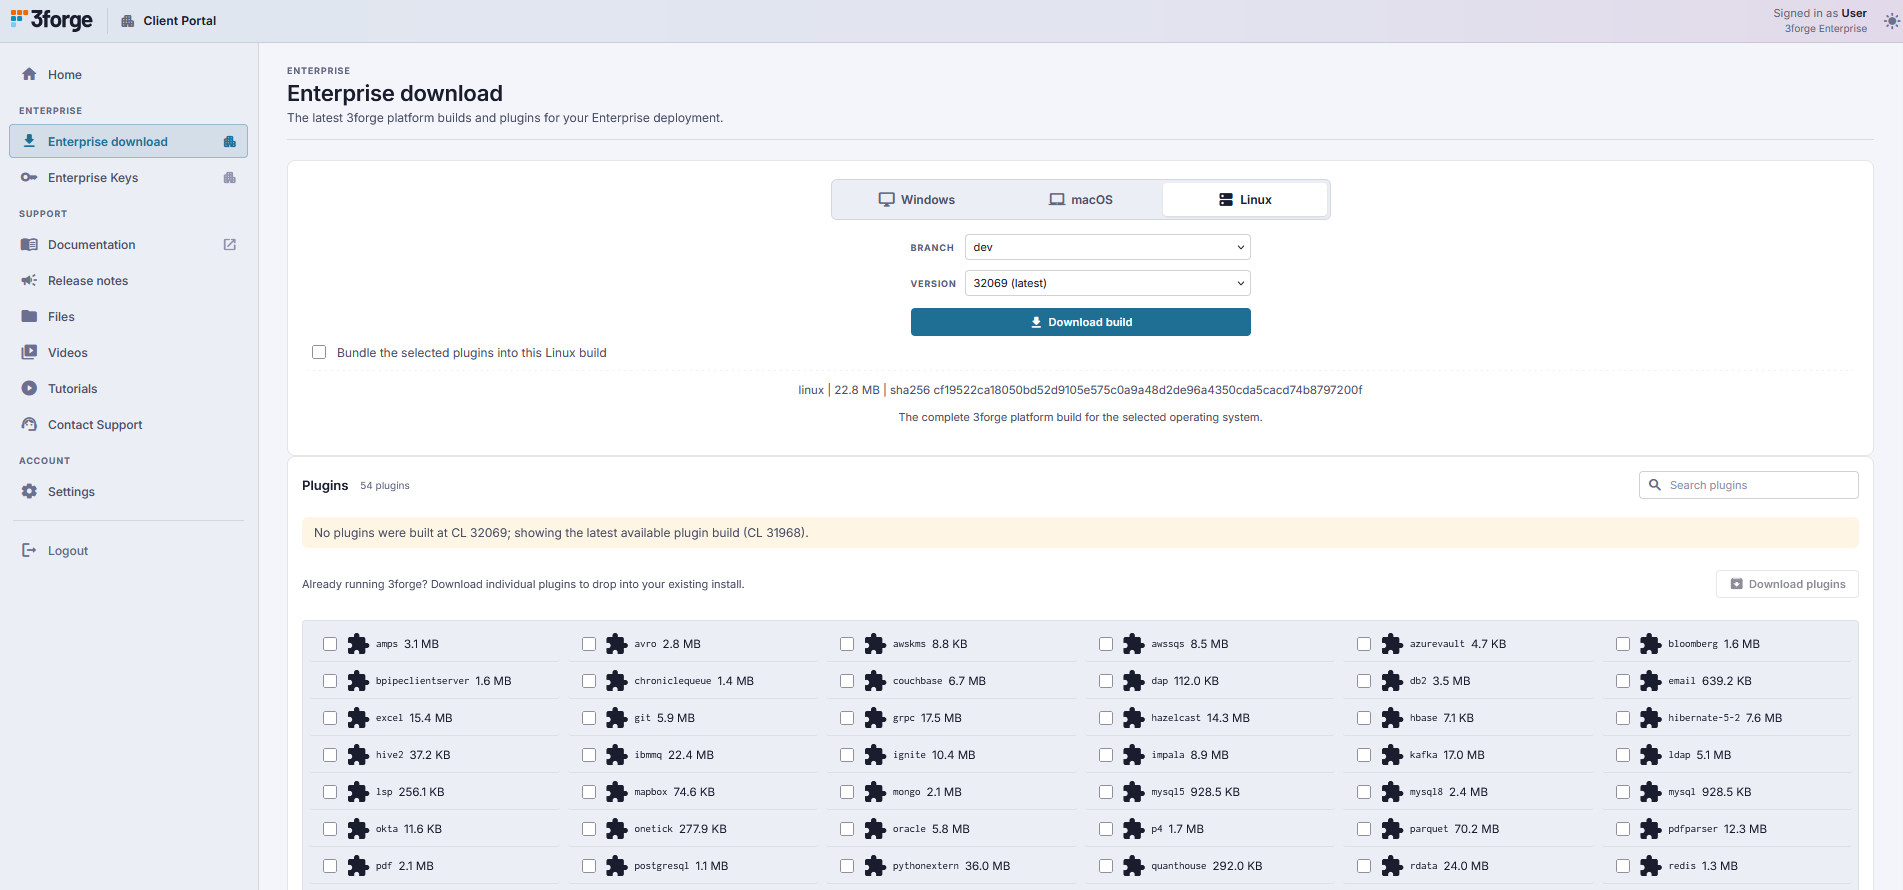
3forge Enterprise is downloaded from the 3forge Client Portal.
- Log in to the portal at https://portal.3forge.com. If you do not have a login, you can register at this time. You can confirm your status as an Enterprise user in the top-right corner of the portal.
- Open "Enterprise download". Choose your operating system and your build. Your regional support team will recommend a specific build based on what you intend to deploy.
- The page builds an archive to your selection: operating system, assigned version, and the plugins you need. Plugins are versioned separately from the runtime and can be added later, so you can select them now or return later (see Managed Plugins).
- Download your build.
Install and Start
-
Run the
.exefile to start the installation wizard and follow the steps to install. The wizard's final screen offers to launch AmiCore.Windows Defender SmartScreen Warning
You may encounter a Windows Defender SmartScreen warning. If this happens, click on the "More info" pop-up, and select "Run anyway." For older versions of Windows (10 or earlier), right-click on the executable file and go to Properties -> General and under the Security section, check "Unblock."
-
If the wizard did not launch it, launch "AMI Core" from your Start Menu, or run the
amicore.exeapplication located in the installation'samicoredirectory. -
On first launch, the "AMI - Set Up Credentials" window opens, populated with the default credentials
demo/demo123. Replace them with your own username and password, then submit. The window cannot be skipped: AmiCore does not start until a username and password are submitted. This creates the initial admin indata/access.txtand populates the rest ofdata/. See Security Defaults for how the initial admin is established.If the setup window did not appear
Add the initial admin to the installation's
data/access.txtdirectly, one line per user, in the same format as the Linux tab:Note
Submitting the window unchanged creates an admin named
demowith the passworddemo123. -
Your browser opens the Web's HTTPS address,
https://localhost:33333/. Log in with the username and password you entered in the previous step.The page shown after setup lists demo / demo123
After setup, the page that opens still states that the default login is
demo/demo123, even when other credentials were entered. That pair works only if you submitted the setup window unchanged. Log in with the credentials you entered.
-
Extract the
.tar.gzarchive into the directory you want to install into:The archive extracts to
ami/amicore/inside the target directory. The rest of this page callsami/amicore/the installation root. -
Change to the installation root:
-
Create the initial admin credentials in
data/access.txt. The archive does not include adata/directory, so create it first:Replace
someuser|somepasswordwith your own username and password. -
Navigate to the installation's
scripts/directory and run the startup script:Startup fails without access.txt
Without a valid
data/access.txt,start.shstops and prints the command to run, with the full path to your installation:Run the printed command with your own username and password, then run
start.shagain.The script prints a banner while it starts, then reports the paths it is using and the addresses to open:
Note
The scripts may need executable permissions. If so, run
chmod +x *.shin thescripts/directory. -
Open the secure web server address printed by the script. By default this is
https://localhost:33333/. -
Log in with the credentials you created in
data/access.txt. Ignore the banner's last two lines: thedemo/demo123pair it prints does not work, see Security Defaults.
The HTTP address redirects to HTTPS
TLS is enabled by default, so the HTTP listener on 33332 does not serve the application. Every request is redirected to the same path on the HTTPS listener on 33333, preserving the host you asked for.
On a fresh install that certificate is self-signed, so your browser shows a certificate warning the first time you connect. This is expected on a new instance. See Server Certificates for how to replace the shipped certificate, and Security Defaults for the rest of the shipped security posture.
Changing the Java Version on Linux
On first startup, start.sh detects the Java version and writes JVM options to match in amicore_linux.vmoptions, in the installation root. It starts without additional configuration in most cases. This section applies to Linux only: the Windows installer runs its own included Java runtime.
If you change or update the Java version afterward, the generated options may become incompatible with the new version, causing the JVM to fail to build. For example, options generated for Java 11 fail on Java 8: start.sh reports STARTUP FAILED. View log/AmiCore.stderr and log/AmiCore.log for details, and the installation's log/AmiCore.stderr ends with:
To resolve this, delete amicore_linux.vmoptions from the installation root and run start.sh again. The script regenerates the file for the Java version now in use.
To run AmiCore under a specific Java installation when several are present, replace every java command in scripts/start.sh with the full path to the Java version you want. The script calls java in 5 places, including the line that detects the version, so replacing only some of them detects one Java and runs another. From the installation root, for example:
Then delete amicore_linux.vmoptions if it exists, and run start.sh. An upgrade replaces scripts/start.sh, so repeat the edit after upgrading.
Minimum Environment
| Component | Minimum | Suggested |
|---|---|---|
| Operating system | Ubuntu, Fedora/Red Hat, CentOS, macOS, Windows (full support for Java 8 or later) | Unix environment with Java 8 or later |
| RAM | 4 GB | 32 GB or more |
| Disk | 20 GB | 100 GB or more |
| Processor | 2 GHz CPU (Intel or AMD) | 3 GHz CPU, 8 cores or more |
| Client browser | Up-to-date Microsoft Edge, Chrome, Firefox, or Safari | Same |
| Network | Server must reach data sources; firewalls must allow connections to the Web listener port | Same |
Lowering the maximum heap on Linux
On Linux, start.sh writes amicore_linux.vmoptions with a maximum heap of 19 GB (-Xmx19g) the first time it runs, including a run that fails. On a machine near the minimum specification above, lower it:
- Run
start.shonce so the file exists, then stop AmiCore withscripts/stop.sh. - Edit the
-Xmx19gline inamicore_linux.vmoptions, for example to-Xmx2g. - Run
start.shagain.
An upgrade keeps amicore_linux.vmoptions, so the change survives it.
Directory Layout
The installation is a single directory tree under amicore/. On Linux it sits inside ami/ in the directory you extracted to; on Windows it sits in the installation folder you chose, beside the included jre/.
Configuration Model
3forge Enterprise separates shipped defaults from your overrides.
- Never edit
config/defaults.properties. The runtime compares it against an embedded copy at startup and reports drift, controlled by-Dvalidate.default.properties=WARN|EXIT|SKIP(the startup script setsWARN). -
Put every override in
config/local.properties. To extend a shipped list rather than replace it, reference the existing value: -
Most files under
data/are watched and hot-reloaded at runtime, includingami.components,relay.routes, andrelay.feedhandlers, so day-to-day changes do not require a restart. Shut down first only when you want to coordinate changes across multiple files.
Default listener ports
By default, AmiCore assigns the following listener ports:
- Center:
3270(native)- JDBC:
3280 - DB Console:
3290
- JDBC:
- Relay:
3289 - Web (HTTP):
33332(redirects to HTTPS) - Web (HTTPS):
33333 - f1 admin console:
3285
The Gateway's ports, 3406 (native) and 3407 (JDBC), are configured by default, but a new installation does not run a Gateway: its components file declares only a Center, a Relay, and a Web. To add one, see the Gateway Quickstart.
The full component and port reference is in Components.
Upgrading AmiCore
An upgrade installs a new build over an existing installation, replacing the runtime and keeping your data, credentials, and configuration overrides.
Warning
Running an upgrade is not reversible and will overwrite the shipped files in your existing installation. We strongly recommend backing up the installation directory before proceeding.
An upgrade keeps:
data/, includingaccess.txtpersist/keys/config/local.propertiesamicore_linux.vmoptions(Linux)f1license.txt, the license file
An upgrade replaces:
lib/config/, exceptlocal.propertiesscripts/, including any edits tostart.shamicore.exeand the includedjre/(Windows)
Note
If you have a modified start.sh, copy it elsewhere before upgrading and reapply your changes afterward.
- Stop AmiCore.
- Run the new build's
.exefile. The wizard selects the folder of the previous installation. - Keep that folder to upgrade in place, or choose a new folder to install the new build separately beside the old one.
- Follow the remaining steps and launch AmiCore from the final screen.
-
Stop AmiCore from the installation's
scripts/directory: -
Extract the new archive into the same directory you extracted the existing installation into:
-
Reapply any changes to
scripts/start.sh, then runstart.sh.
Plugins are versioned separately from the runtime. After upgrading, check that your plugins match the new build; see Managed Plugins.
Next Steps
- Security Defaults: the initial admin, TLS, and the file-system sandbox.
- Server Certificates: replacing the shipped self-signed certificate, needed before most clients will connect over TLS.
- Licensing: create and install a license (without one, the instance runs in demo mode and shuts down after 2 hours).
- What's New in 3forge Enterprise: if you are migrating an existing application, what to copy and what not to.