Network Graph of Components
Known issues
Some chart features have known issues in the current release. See Known issues.
This walkthrough draws components as nodes joined to the ones they report to, answering "What feeds what?"
Prerequisites
- Editor mode: click once on the screen, then press Ctrl+d. The AMIDB Shell Tool and the gallery are used as in the quickstart.
- Data: the example data that stage 1 creates. To use a table of your own instead, see With your own data.
1. Create the example data
The chart reads a table in the Center, so create the table first.
- Select Dashboard -> AMIDB Shell Tool....
-
Run:
-
Check that the lower pane shows the 7 rows.
The template draws each node where its columns place it and computes no layout, so each row holds its own position and its parent's. A node that is its own parent, as "Center" is here, has no edge.
2. Create the chart
The gallery creates a datamodel that reads the table, then places the chart.
- Select Windows -> New Window, then the edit button on
Blank1, then "Create Table / Visualization / Form". - Select "AMI (__AMI)", then "Next >>".
- Select the "USER" tile
ChartDemoNet, then "Next >>". - Select "Test (alt+enter)", then "Next >>".
- Select the "Flow" tab, then the "Network Graph" tile.
-
Set the fields below the tiles:
Field Value "Node X:" X"Node Y:" Y"Label:" Name"Node size:" Size"Parent X:" ParentX"Parent Y:" ParentY -
Select "Finish".
- Check that the window shows 7 labeled nodes, with edges from "Relay A", "Relay B", and "Web" to "Center", and from each feed to its relay.
Result
7 circles, "Center" the largest, joined by gray edges: 3 to "Center" and 3 from the feeds to their relays.
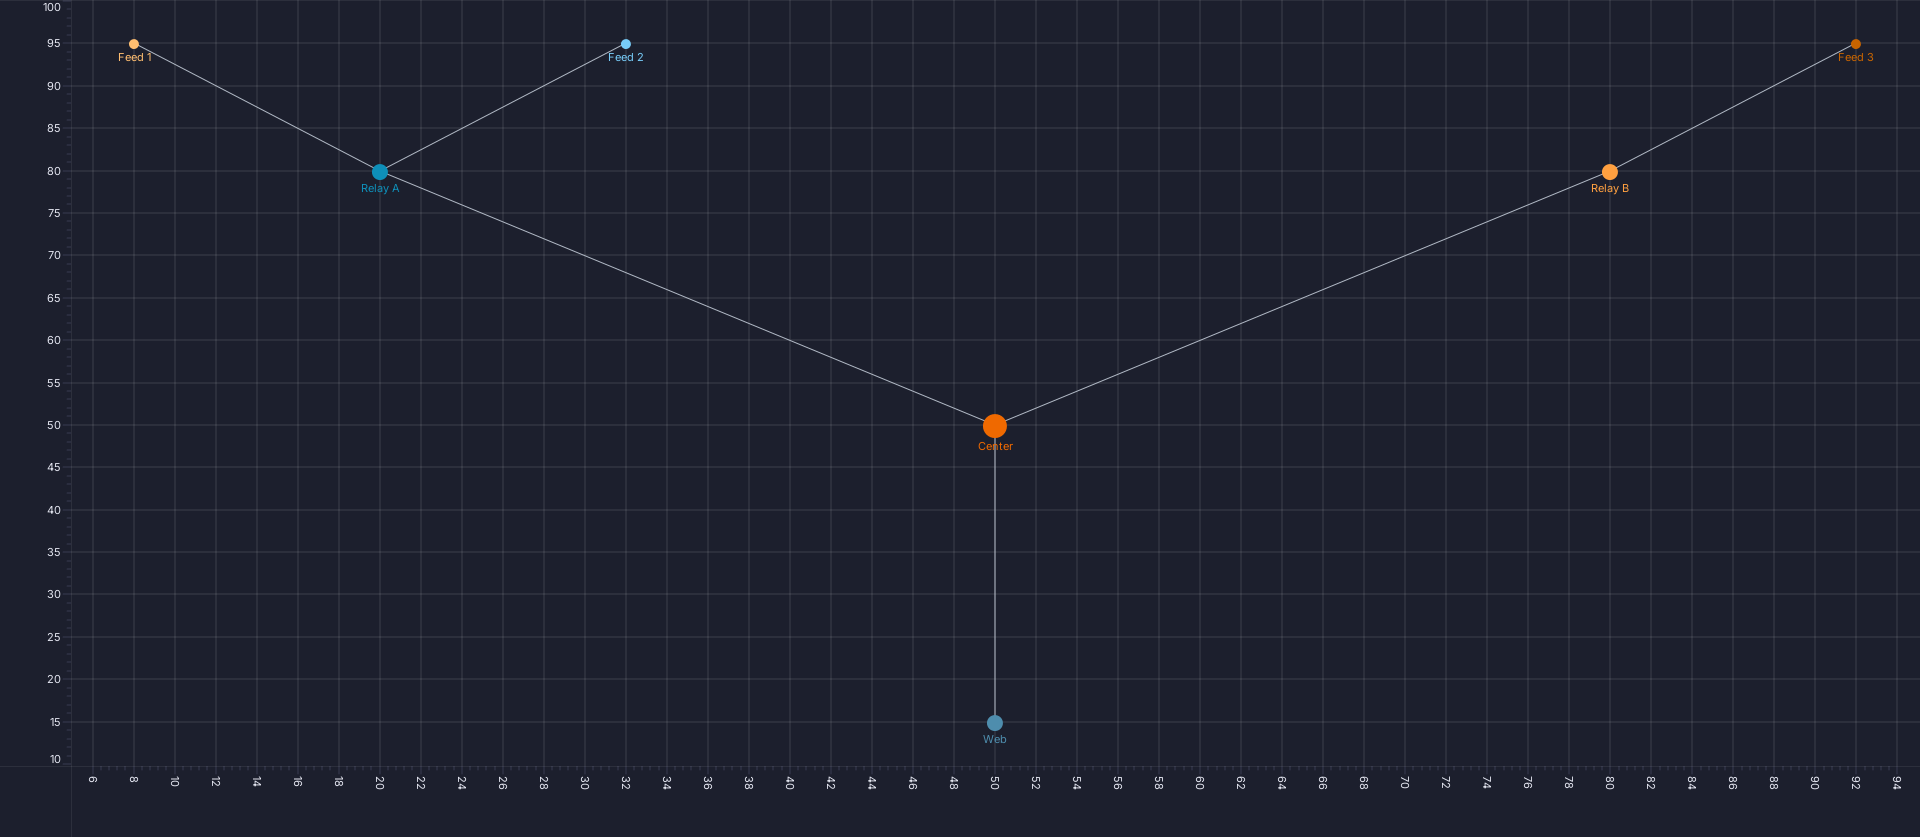
The chart's own PNG export, from AmiScript toImagePng; see Chart type walkthroughs.
To check without looking, read the render stats: session.getDevTools().getAllRenderStats() in the AMIDB Shell Tool, with "Run on this web session" selected (see Running a script), or web_debug op=panelRenderStats over MCP. The "Nodes" layer reports Rows 7, and the "Edges" layer Rows 7 and "7 groups", each with an empty Problem.
With your own data
The chart needs the position of every node: its x and y and, for a node joined to a parent, the parent's x and y. The template computes no positions, so the datamodel must supply every one: these charts suit data that already carries its positions, or a query written for one fixed layout. To filter rows, or to total raw rows first, see Using your own data.
Over MCP
An agent builds the same chart from the same table. Connecting an agent is covered in the AI section; the tools are on Building charts over MCP.
-
Create the datamodel with
web_executeop=importDatamodeland thisdmJson, then run it once withop=initDatamodelSchemaanddmNameChartDemoNet: -
Create the chart:
-
Run the datamodel again with
web_executeop=executeDatamodel,dmNameChartDemoNet. A chart created over MCP can stay empty until its datamodel runs again, with its axes at 0-100. - Confirm that every layer reports the rows above and an empty
Problem: runweb_debugop=panelRenderStats.
The call is web_create_chart_from_template.
Removing the example
Remove the chart, then its datamodel, then the table, so that the next walkthrough can reuse the names:
- Close the chart's window with its close button, and select "Delete" when asked whether to delete the panel.
- Select Dashboard -> Data Modeler..., expand "Datamodels", right-click the chart's datamodel,
ChartDemoNet, and select "Delete Datamodel", then "Yes". If that name was taken when stage 2 ran, the gallery added a number to it, as inChartDemoNet1. - Run
DROP TABLE ChartDemoNet;in the AMIDB Shell Tool. - Check that
SELECT * FROM ChartDemoNet;reportsUnknown table: ChartDemoNet.
Over MCP, delete the chart with web_danger op=deletePanel, then the datamodel with op=deleteDatamodel, dmName ChartDemoNet, and drop the table as in step 3. deleteDatamodel refuses a datamodel that has been committed; delete that one in the Data Modeler as in step 2. See Removing an agent's chart.